Back to part 4
In this part, we will talk about a quite interesting and useful topic in Nspire Lua programming, which relies on working with “objects” instead of (or in addition to…) classic variables.
If you already have some Lua knowledge, you should know that it is using a lot of key-indexed or key/value tables. This means that each element of a table (or list) is linked to a key that lets us to refer with. For example the table below is key-indexed with strings :
tab = {"cle1"="valeur1", "cle2"="valeur2"}
print(tab["cle1"]) -- va afficher "valeur1" |
tab = {"cle1"="valeur1", "cle2"="valeur2"}
print(tab["cle1"]) -- va afficher "valeur1"
In Lua, keys are polymorphic, that way we can easily store strings, tables or functions as key or as value :
tab = {
  [1]="exemple",
  "2"="de",
  [function() return 3 end]="table",
  [false]="polymorphe"
}

for k, v in pairs(tab) do
  print(k, v)
end |
tab = {
[1]="exemple",
"2"="de",
[function() return 3 end]="table",
[false]="polymorphe"
}
for k, v in pairs(tab) do
print(k, v)
end
Will display :
1                 exemple
2                 de
function: 10f6840 table
false polymorphe |
1 exemple
2 de
function: 10f6840 table
false polymorphe
Even the Lua global environment (_G) is a table.
It’s in this way we’re going to introduce Lua object-oriented-programming (“OOP”) : Each object is a table and each object has multiple elements named methods or properties. In the future if we would like to create a new object we simply duplicate the table from its meta-table. If we would like to create inherited objects, we will also duplicate its meta-table and change it a little bit to make it different from the main object.
myObject = {
    nom="toto",
    age=21,
    ChangerNom=function(self, nom)
        if #nom > 1 then
            self.nom = nom
        end
    end,
    ChangerAge=function(self, age)
        if age > 1 then
            self.age = age
        end
    end
} |
myObject = {
nom="toto",
age=21,
ChangerNom=function(self, nom)
if #nom > 1 then
self.nom = nom
end
end,
ChangerAge=function(self, age)
if age > 1 then
self.age = age
end
end
}
We can easily access/write stuff on any element. For example :
print(myObject.age) -- affiche 21
myObject:ChangerAge(18) -- identique à myObject.ChangerAge(myObject, 18)
print(myObject.age) -- affiche 18 |
print(myObject.age) -- affiche 21
myObject:ChangerAge(18) -- identique à myObject.ChangerAge(myObject, 18)
print(myObject.age) -- affiche 18
You have to understand that there is no such thing as private/public things in Lua as you could find in C++/C#/Java…, since this is just a representation, and not a real implementation. So it can be easier in Lua, especially for beginners.
You can now understand why you call platform.window:width() this way, and not with a global function such as “GetWindowWidth()”. In fact, width() is a method of the window object, which itself is a property of the platform object. Same thing for platform.gc() which we can find shortened as ‘gc‘. Actually, gc is an object and platform.gc() is its “constructor”.
In one hand, it’s pretty much the same thing (they both have the same methods), but in the other hand, they have some differences (some of their properties aren’t the same).
(NB : In Nspire Lua code, try to avoid using gc by calling platform.gc(), because of some unexpected behaviors you can get if you don’t know exactly what you’re doing. You should always use the gc that the on.paint(gc) event provides as a parameter)
Let’s tell you what classes look like in code and how to create them.
In the Nspire Lua API, we can find a “class()” method, that usualy doesn’t come with Lua. In fact, this method was created to help programmers create their class by having a much easier and shorter way to do it. For the curious people among our readers, here’s what we would have to do to create and use a class without the class() method (here, for the “Account” class).
(it can be scary if you don’t know Lua well – you can skip this paragraph if you want)
Account = {}
Account.__index = Account

function Account.create(balance)
    local acnt = {}             -- our new object
    setmetatable(acnt,Account)  -- make Account handle lookup
    acnt.balance = balance      -- initialize our object
    return acnt
end

function Account:withdraw(amount)
    self.balance = self.balance - amount
end

-- create and use an Account
acc = Account.create(1000)
acc:withdraw(100) |
Account = {}
Account.__index = Account
function Account.create(balance)
local acnt = {} -- our new object
setmetatable(acnt,Account) -- make Account handle lookup
acnt.balance = balance -- initialize our object
return acnt
end
function Account:withdraw(amount)
self.balance = self.balance - amount
end
-- create and use an Account
acc = Account.create(1000)
acc:withdraw(100)
Now, with the Nspire Lua API, with class() :
Account = class()

function Account:init(balance)
    self.balance = balance      -- initialize our object
end

function Account:withdraw(amount)
    self.balance = self.balance - amount
end

-- create and use an Account
acc = Account(1000)
acc:withdraw(100) |
Account = class()
function Account:init(balance)
self.balance = balance -- initialize our object
end
function Account:withdraw(amount)
self.balance = self.balance - amount
end
-- create and use an Account
acc = Account(1000)
acc:withdraw(100)
That’s much better, right ?
Here, “init()” is the constructor. You *have* to have an “init(…)” method for your classes since it’s written that way in the class() method. The init(…) function will be the one that will be called when your objects are going to be created.
We are going to show you a real example of OOP programming in Lua, by creating a script that will create a class, called “Shape”, which will have several methods including a constructor allowing us to creates shapes.
Forme = class()

-- Constructeur
function Forme:init(x, y, image)
    self.xpos = x
    self.ypos = y
    self.pic = image
end

-- Dessiner la forme
function Forme:paint(gc)
    gc:drawImage(self.pic, self.xpos, self.ypos)
end

-- Repositionner l'objet en indiquant les nouvelles coordonnees
function Forme:setxy(newx, newy)
    if newx > xmin and newx < xmax and newy > ymin and newy < ymax then
        self.xpos = newx
        self.ypos = newy
   end
end

-- Repositionner l'objet en indiquant le deplacement a effectuer
function Forme:move(dx, dy)
    local newx,newy
    self:setxy(self.xpos + dx,self.ypos + dy)
end |
Forme = class()
-- Constructeur
function Forme:init(x, y, image)
self.xpos = x
self.ypos = y
self.pic = image
end
-- Dessiner la forme
function Forme:paint(gc)
gc:drawImage(self.pic, self.xpos, self.ypos)
end
-- Repositionner l'objet en indiquant les nouvelles coordonnees
function Forme:setxy(newx, newy)
if newx > xmin and newx < xmax and newy > ymin and newy < ymax then
self.xpos = newx
self.ypos = newy
end
end
-- Repositionner l'objet en indiquant le deplacement a effectuer
function Forme:move(dx, dy)
local newx,newy
self:setxy(self.xpos + dx,self.ypos + dy)
end
You may have noticed the use of global variables like xmin, xmax. These are defined earlier in the script, without . For example :
xmin = 20
ymin = 30
xmax = 250
ymax = 200 |
xmin = 20
ymin = 30
xmax = 250
ymax = 200
We can now play around with our “Shape” class. We’re now going to create two images and convert them into TI.Images using the official developement tool :
carre_rouge = image.new("\010\000\000\000\010\000\000\000\000\000\000\000\020\000\000\000\016\000\001\000\227\252\227\252\227\252\227\252\227\252\227\252\227\252\227\252\227\252\227\252\227\252\227\252\227\252\227\252\227\252\227\252\227\252\227\252\227\252\227\252\227\252\227\252\227\252\227\252\227\252\227\252\227\252\227\252\227\252\227\252\227\252\227\252\227\252\227\252\227\252\227\252\227\252\227\252\227\252\227\252\227\252\227\252\227\252\227\252\227\252\227\252\227\252\227\252\227\252\227\252\227\252\227\252\227\252\227\252\227\252\227\252\227\252\227\252\227\252\227\252\227\252\227\252\227\252\227\252\227\252\227\252\227\252\227\252\227\252\227\252\227\252\227\252\227\252\227\252\227\252\227\252\227\252\227\252\227\252\227\252\227\252\227\252\227\252\227\252\227\252\227\252\227\252\227\252\227\252\227\252\227\252\227\252\227\252\227\252\227\252\227\252\227\252\227\252\227\252\227\252")
smiley = image.new("\016\000\000\000\018\000\000\000\000\000\000\000 \000\000\000\016\000\001\000\156\243\156\243\156\243\189\247\213\222\235\193\136\181g\181\135\181g\181\137\185O\202\189\247\156\243\156\243\156\243\156\243\156\243{\239O\206\168\222F\243D\243d\247d\247#\243\004\235E\214\170\1858\231\156\243\156\243\156\243\213\222m\210\231\230d\247\132\251\195\255\131\255\131\255\131\255C\251\003\247\132\226\233\193r\210z\239\156\243\204\189\198\226\132\247\166\218\007\198\198\226\195\255\131\255#\243\231\197\007\198\002\251\131\230\135\185\246\222\212\218g\210D\243\166\218\166\218\197\226D\239\131\255\131\255C\247\165\218d\222\006\206\194\242\196\205O\206\170\185\005\239\131\255\197\226D\239\131\255\131\255\131\255\131\255C\251\034\255\002\255E\218\226\250b\234\167\193G\173C\247\131\255\131\255\130\218\001\198\162\222\131\255c\251\002\243\161\197\161\197\226\250\226\250\162\246\133\193f\181#\243C\251\131\255\194\193\194\156\002\202C\251\034\255\162\234\194\156\194\156\193\250\193\254\193\254\133\193g\181\003\247c\251\034\255\196\230e\218\196\234\034\255\034\255\226\242%\218%\218\226\250\226\250\161\254\133\193&\169\226\242\034\255\034\255\034\255\034\255\034\255\002\255\002\255\193\254\193\254\226\250\161\254\161\254\161\254d\189G\173\163\234\002\255\226\242\194\242\163\234\162\242\162\242\162\242\130\238\130\242B\242\130\242\162\246B\242\133\193\014\198E\214\194\242f\181\198\156\231\156\231\156\231\156\231\156\231\156\231\156\198\156\231\156B\242\227\213\235\197Y\235\136\185\130\238\193\254\132\189s\206\222\251\222\251\222\251\222\251{\239\198\156\130\242\129\254d\189\179\214\156\243\237\193\196\205\162\242\162\242\198\201)\165)\165)\165)\165H\173B\242\129\254\227\213\169\193\023\227\156\243z\239\137\185\034\226\162\246\130\242B\234\034\230\034\230B\234\034\234\129\254\130\242D\181\213\222\156\243\156\243\156\243\023\227\201\197\002\222\162\246\161\254\129\254\161\254\129\254\129\250\034\234d\189\147\214\156\243\156\243\156\243\156\243\156\243\246\222\011\206\196\205\002\222B\238\034\238\034\230\196\209\165\197\147\214{\239\156\243\156\243\156\243\189\247\156\243\156\243\023\227p\210\011\206\198\205\198\205\232\205O\210\147\214\156\243\156\243\156\243\156\243")
forme1 = Forme (xmin + 20, ymin + 20, smiley)
forme2 = Forme (xmax - 30, ymax - 30, carre_rouge) |
carre_rouge = image.new("\010\000\000\000\010\000\000\000\000\000\000\000\020\000\000\000\016\000\001\000\227\252\227\252\227\252\227\252\227\252\227\252\227\252\227\252\227\252\227\252\227\252\227\252\227\252\227\252\227\252\227\252\227\252\227\252\227\252\227\252\227\252\227\252\227\252\227\252\227\252\227\252\227\252\227\252\227\252\227\252\227\252\227\252\227\252\227\252\227\252\227\252\227\252\227\252\227\252\227\252\227\252\227\252\227\252\227\252\227\252\227\252\227\252\227\252\227\252\227\252\227\252\227\252\227\252\227\252\227\252\227\252\227\252\227\252\227\252\227\252\227\252\227\252\227\252\227\252\227\252\227\252\227\252\227\252\227\252\227\252\227\252\227\252\227\252\227\252\227\252\227\252\227\252\227\252\227\252\227\252\227\252\227\252\227\252\227\252\227\252\227\252\227\252\227\252\227\252\227\252\227\252\227\252\227\252\227\252\227\252\227\252\227\252\227\252\227\252\227\252")
smiley = image.new("\016\000\000\000\018\000\000\000\000\000\000\000 \000\000\000\016\000\001\000\156\243\156\243\156\243\189\247\213\222\235\193\136\181g\181\135\181g\181\137\185O\202\189\247\156\243\156\243\156\243\156\243\156\243{\239O\206\168\222F\243D\243d\247d\247#\243\004\235E\214\170\1858\231\156\243\156\243\156\243\213\222m\210\231\230d\247\132\251\195\255\131\255\131\255\131\255C\251\003\247\132\226\233\193r\210z\239\156\243\204\189\198\226\132\247\166\218\007\198\198\226\195\255\131\255#\243\231\197\007\198\002\251\131\230\135\185\246\222\212\218g\210D\243\166\218\166\218\197\226D\239\131\255\131\255C\247\165\218d\222\006\206\194\242\196\205O\206\170\185\005\239\131\255\197\226D\239\131\255\131\255\131\255\131\255C\251\034\255\002\255E\218\226\250b\234\167\193G\173C\247\131\255\131\255\130\218\001\198\162\222\131\255c\251\002\243\161\197\161\197\226\250\226\250\162\246\133\193f\181#\243C\251\131\255\194\193\194\156\002\202C\251\034\255\162\234\194\156\194\156\193\250\193\254\193\254\133\193g\181\003\247c\251\034\255\196\230e\218\196\234\034\255\034\255\226\242%\218%\218\226\250\226\250\161\254\133\193&\169\226\242\034\255\034\255\034\255\034\255\034\255\002\255\002\255\193\254\193\254\226\250\161\254\161\254\161\254d\189G\173\163\234\002\255\226\242\194\242\163\234\162\242\162\242\162\242\130\238\130\242B\242\130\242\162\246B\242\133\193\014\198E\214\194\242f\181\198\156\231\156\231\156\231\156\231\156\231\156\231\156\198\156\231\156B\242\227\213\235\197Y\235\136\185\130\238\193\254\132\189s\206\222\251\222\251\222\251\222\251{\239\198\156\130\242\129\254d\189\179\214\156\243\237\193\196\205\162\242\162\242\198\201)\165)\165)\165)\165H\173B\242\129\254\227\213\169\193\023\227\156\243z\239\137\185\034\226\162\246\130\242B\234\034\230\034\230B\234\034\234\129\254\130\242D\181\213\222\156\243\156\243\156\243\023\227\201\197\002\222\162\246\161\254\129\254\161\254\129\254\129\250\034\234d\189\147\214\156\243\156\243\156\243\156\243\156\243\246\222\011\206\196\205\002\222B\238\034\238\034\230\196\209\165\197\147\214{\239\156\243\156\243\156\243\189\247\156\243\156\243\023\227p\210\011\206\198\205\198\205\232\205O\210\147\214\156\243\156\243\156\243\156\243")
forme1 = Forme (xmin + 20, ymin + 20, smiley)
forme2 = Forme (xmax - 30, ymax - 30, carre_rouge)
You can see how we’re not explicitely calling the init() constructor of the Shape class.
In fact, we just have to call Shape(…) and the init will be called with the arguments.
Now we just have to create the main structure of the lua script, with the basic events you should know by now. Here’s what it looks like :
-- Affichage
function on.paint(gc)
    gc:setColorRGB(231, 231, 231)
    gc:fillRect(xmin, ymin, xmax-xmin+15, ymax-ymin+15)
    forme1:paint(gc)
    forme2:paint(gc)
    gc:setColorRGB(0, 0, 255)
    gc:setFont("sansserif" , "b", 11)
    x = gc:drawString("(" .. forme1.xpos..", ".. forme1.ypos .. ")", 50, 0, "top")
end |
-- Affichage
function on.paint(gc)
gc:setColorRGB(231, 231, 231)
gc:fillRect(xmin, ymin, xmax-xmin+15, ymax-ymin+15)
forme1:paint(gc)
forme2:paint(gc)
gc:setColorRGB(0, 0, 255)
gc:setFont("sansserif" , "b", 11)
x = gc:drawString("(" .. forme1.xpos..", ".. forme1.ypos .. ")", 50, 0, "top")
end
-- Permet de deplacer forme1 avec les fleches directionnelles
function on.arrowLeft()
    forme1:move(-5, 0)
end

function on.arrowRight()
    forme1:move(5, 0)
end

function on.arrowUp()
    forme1:move(0, -5)
end

function on.arrowDown()
    forme1:move(0, 5)
end |
-- Permet de deplacer forme1 avec les fleches directionnelles
function on.arrowLeft()
forme1:move(-5, 0)
end
function on.arrowRight()
forme1:move(5, 0)
end
function on.arrowUp()
forme1:move(0, -5)
end
function on.arrowDown()
forme1:move(0, 5)
end
-- Permet de choisir l'emplacement de forme2 avec la souris
function on.mouseDown(wx, wy)
    forme2:setxy(wx, wy)
end |
-- Permet de choisir l'emplacement de forme2 avec la souris
function on.mouseDown(wx, wy)
forme2:setxy(wx, wy)
end
Here’s what you get !

Have fun !
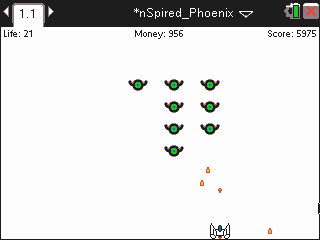
NB : you can find examples of classes and OOP programming in real games programmed in the Nspire Lua API. For instance : the BreakOut game by Adriweb, which uses different classes to have objects such as the ball(s), the blocks, the paddle, the bonuses etc.